Our Work · Specialty Pieces
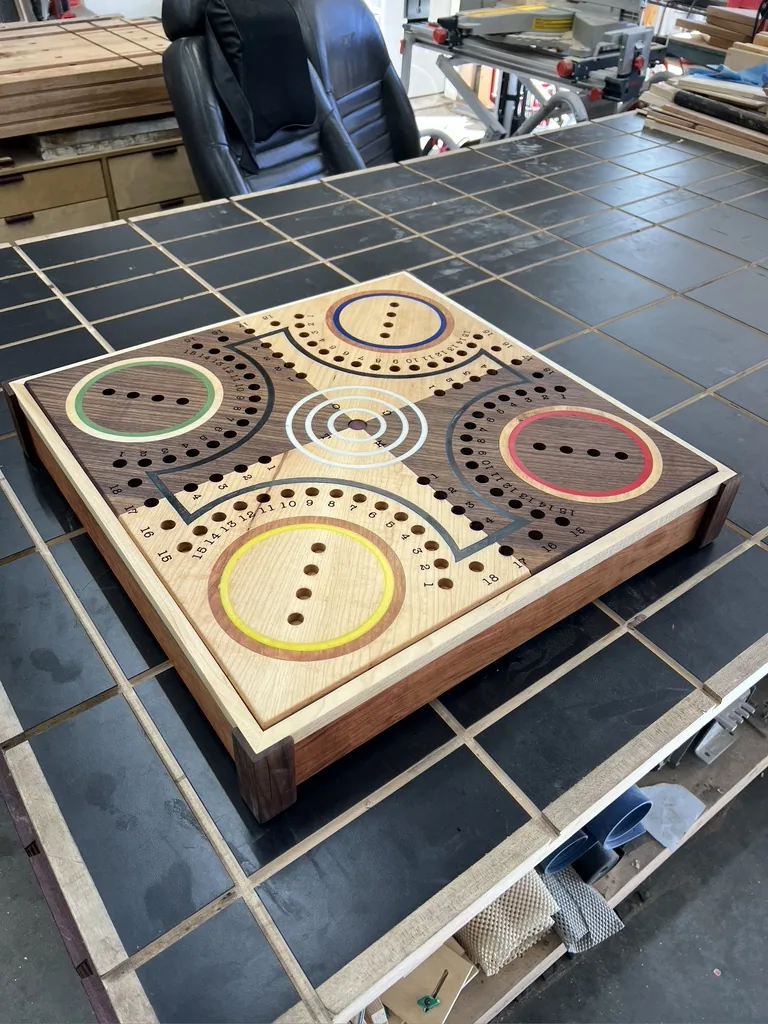
Tock Board with Secret Drawer
A custom Tock board built from a customer's heirloom, with maple and walnut inlay, hand-routed playing tracks, colored epoxy, and a hidden drawer that pops open at the push of the center dot.
How It Was Made
From a worn family board to an heirloom of its own.
Notes from the bench, in Dan's own words.
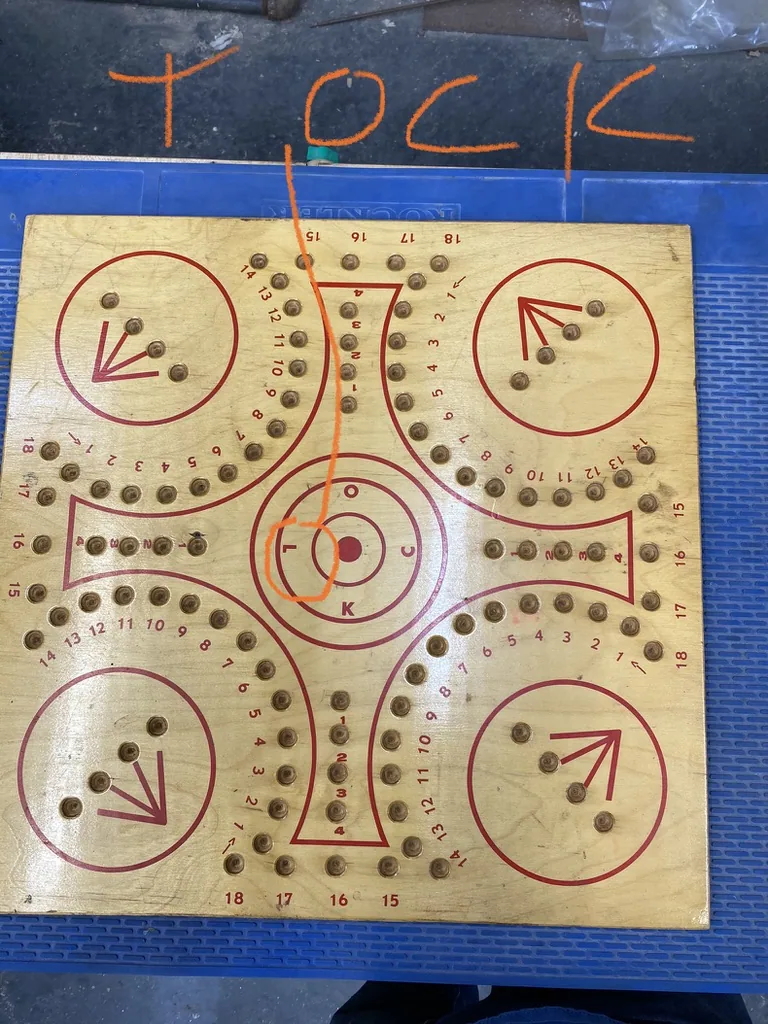
The board that started it
A customer brought me her late mother's Tock board, a simple plywood board drilled with holes, and asked for one of her own to pass down to her family. Tock is a marble-and-cards game played on a board like this, and hers carried a lot of meaning.
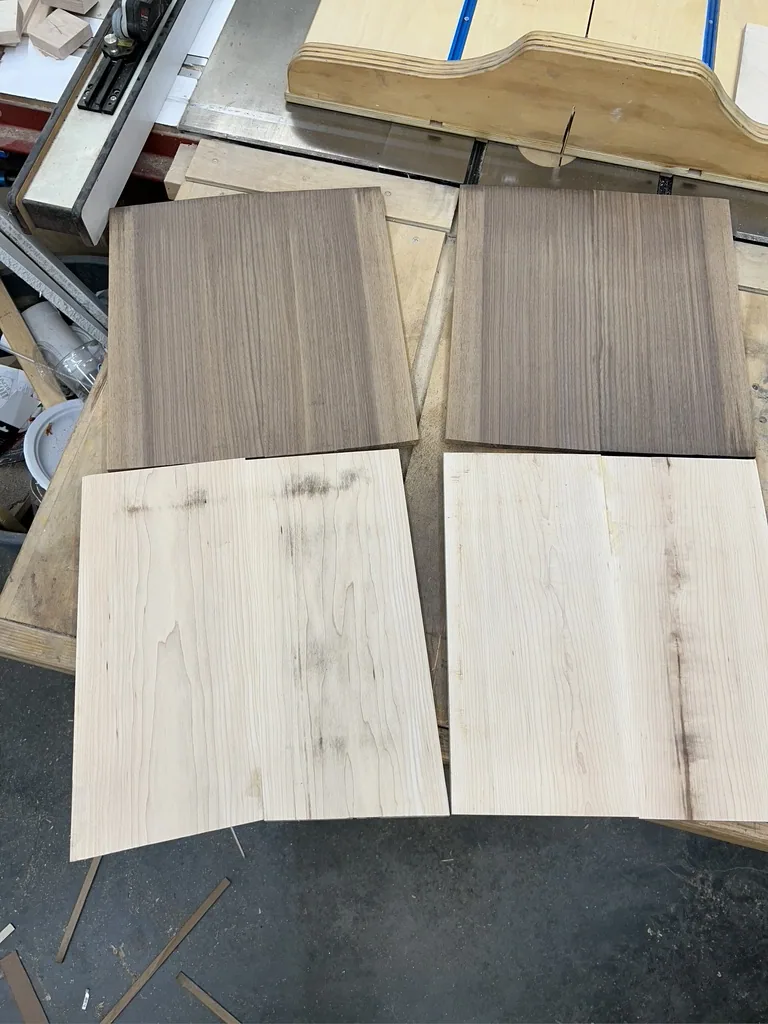
Choosing contrasting woods
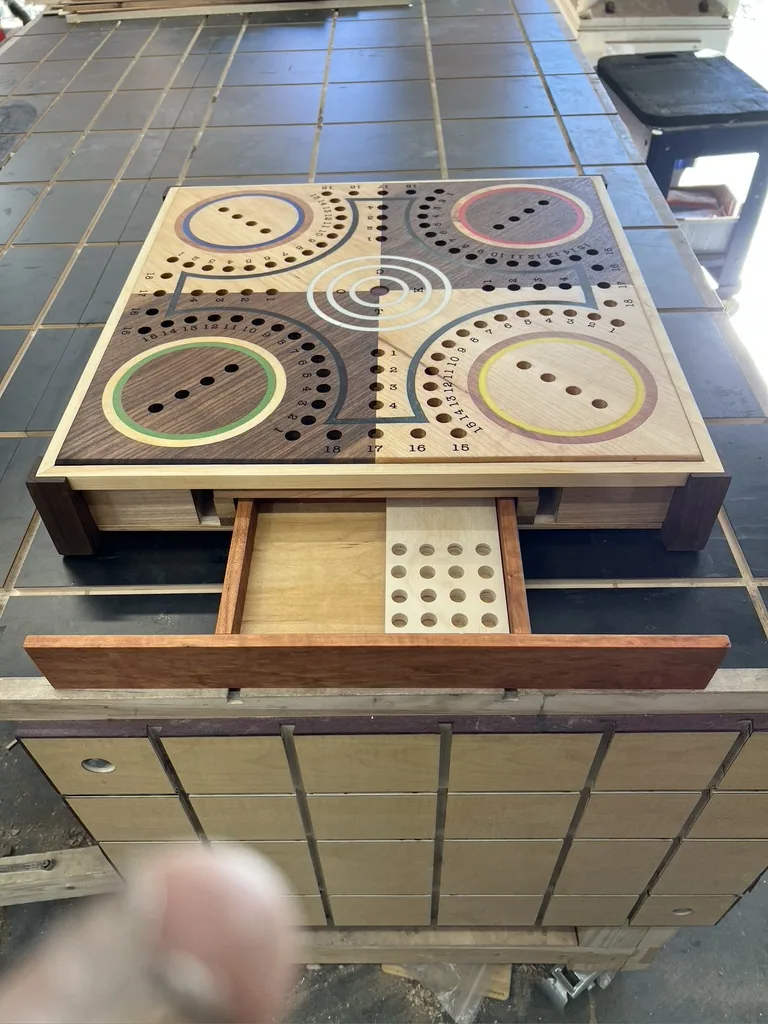
I picked maple and walnut for strong contrast, light against dark, and set up the four corners to overlap with a small rabbet. That way, if the wood moves with the seasons, the joints stay tight and you never see a gap.
Routing the tracks
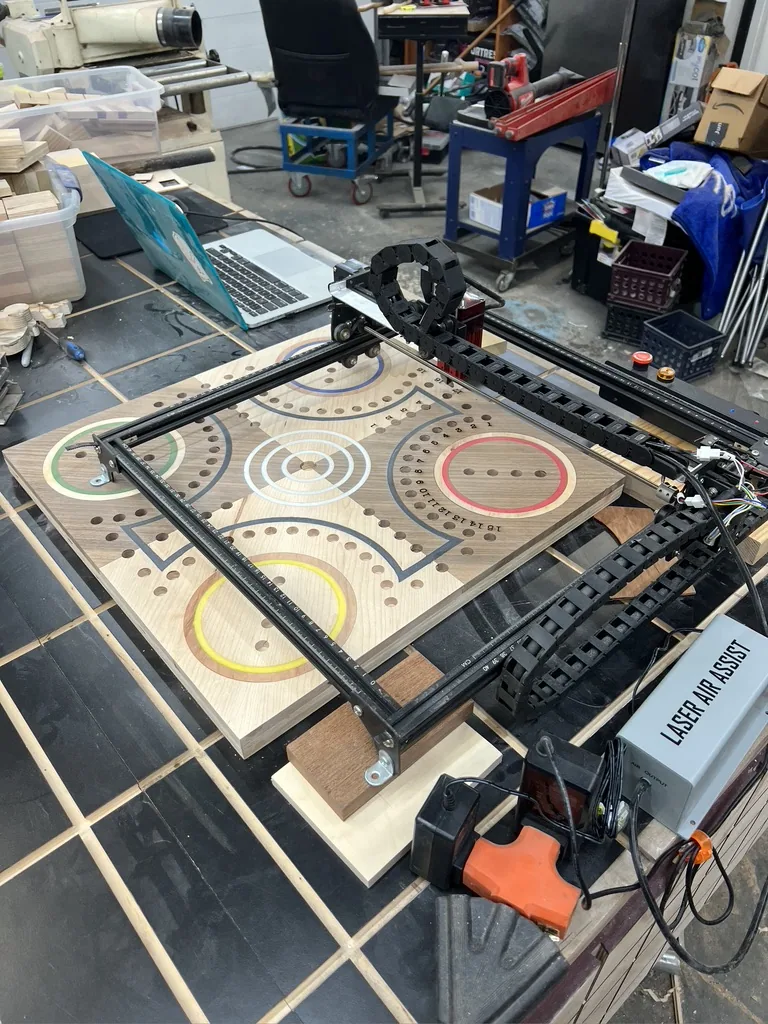
Without a CNC at the time, I cut a thin template on my laser and used it with a follower bit on the router to carve the tracks and the holes. I repeated it corner to corner, then cut the concentric circles in the center with a circle-cutting jig.
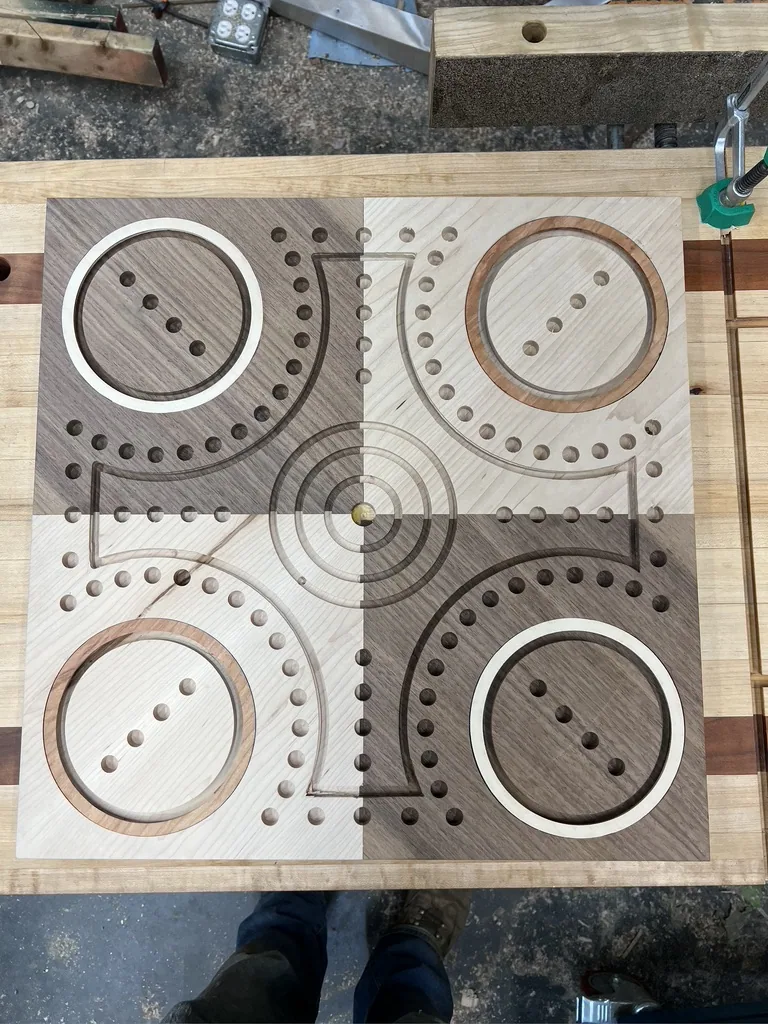
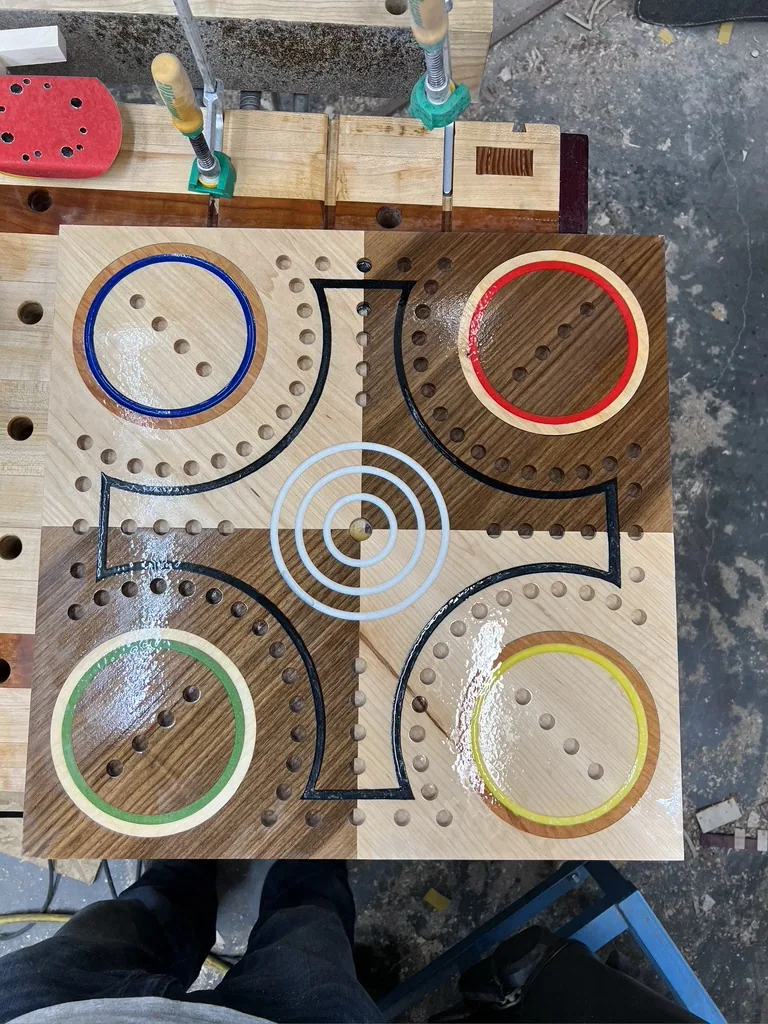
Filling with epoxy
I filled the carved lines and holes with a different colored epoxy for each player, let it cure, then sanded it all flush. People do not realize how satisfying it is to watch the design come up clean out of all that epoxy.
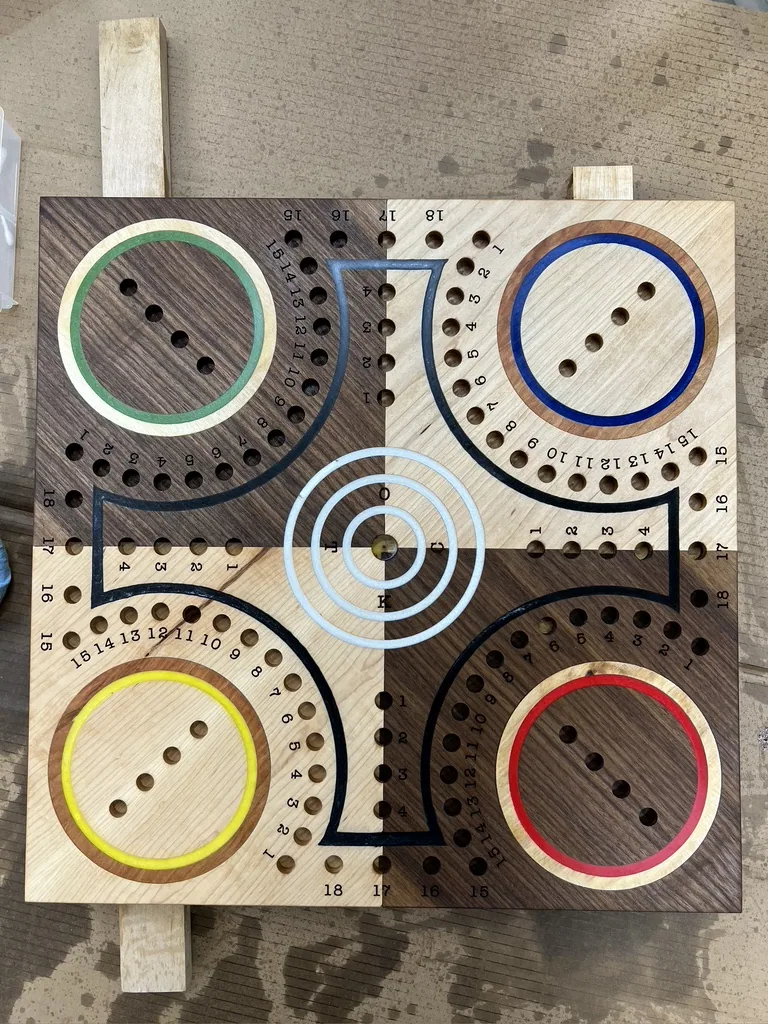
Lasering the numbers
With the board carved and filled, I set my laser right on top of it to burn in all the numbers and the letters that spell Tock, nice and clean.
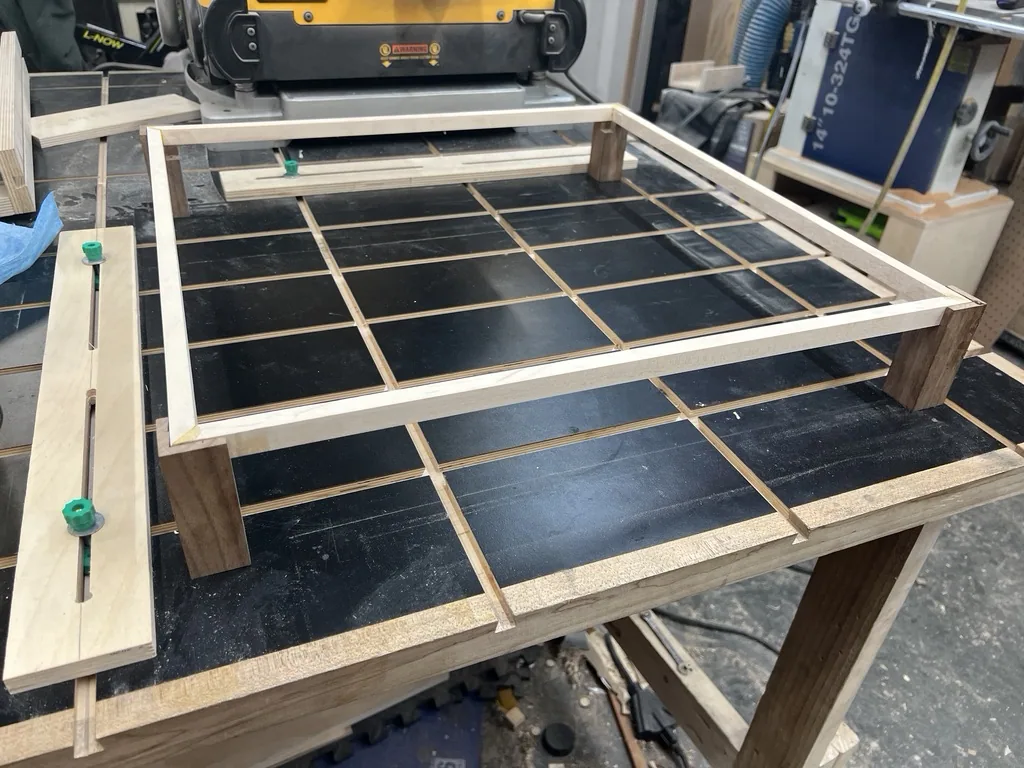
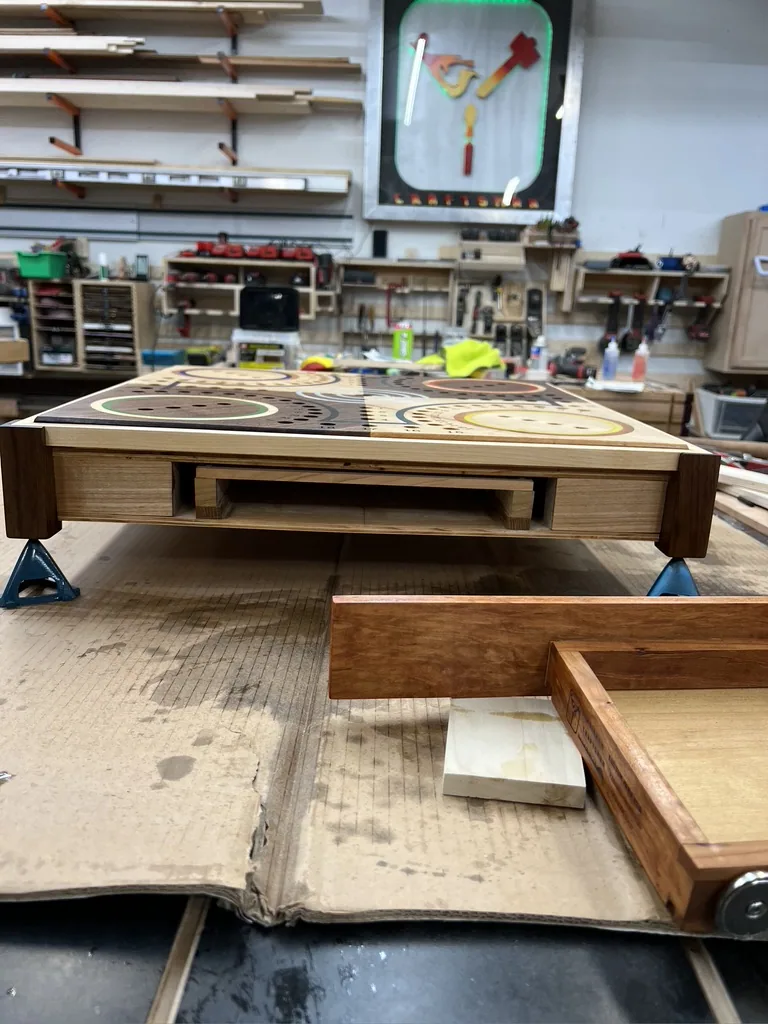
Building the stand
I built a stand for it in maple, walnut, and cherry to match the board, with intricate joinery on the corner legs so everything sits tight. Inside, it hides a drawer for the marbles and the cards.
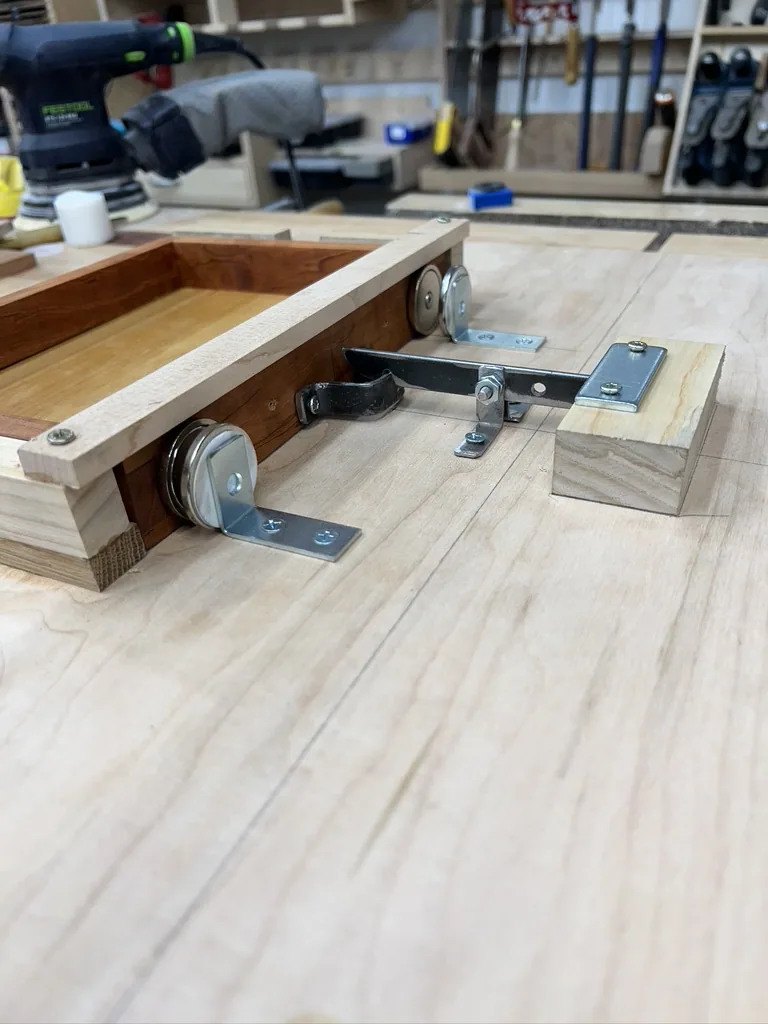
The hidden drawer
I made the whole front of the drawer match the side panels so you cannot tell it is there. Instead of springs, I used opposing magnets: you push it in against them until a catch I fabricated holds it, and a press on the very center dot of the board releases it so it pops out just far enough to reach the pieces.
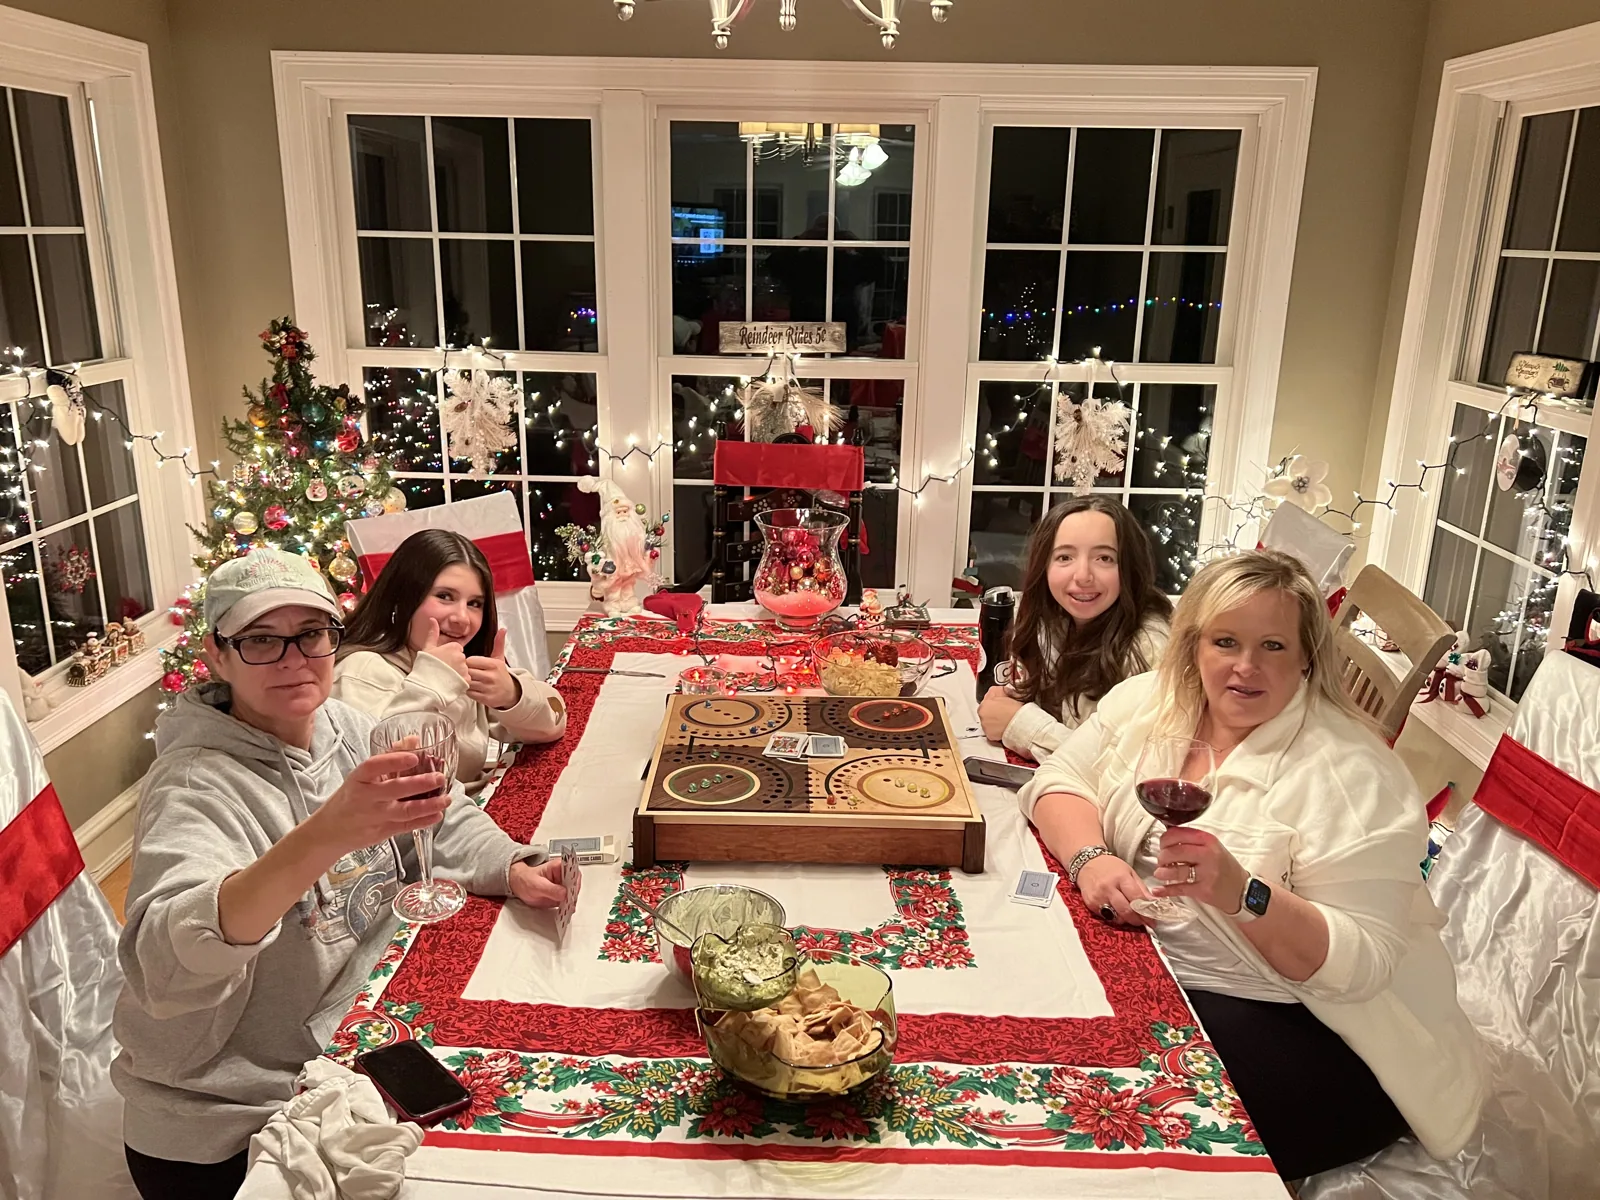
Passed down
A few months later the customer sent me this: her family around their table at Christmas, playing Tock on the board I made. Knowing it will be handed down for generations is about the best thing this work gives me.
I build every piece to last for generations, with the same attention to the wood, the joinery, and the finish that went into this one. If you have something in mind for your own home, I would love to talk it through.
Inquire about a similar pieceBegin a Project
Considering a piece of work for your home?
We take on a limited number of projects each year. Reach out with what you have in mind and we will be in touch to discuss the space, the materials, and the timing.